Falcon Gateway cannot receive studies
Check the following:
- The DIMSE port (default 1116) is not blocked by a firewall.
- The modality or PACS is configured with the correct AE Title, IP address, and port.
- Local network permission was granted in macOS.
Falcon Gateway on macOS
Falcon Gateway allows your Mac to receive DICOM studies from modalities or PACS systems and securely upload them to Falcon Cloud.
This guide explains how to download, install, and configure Falcon Gateway on macOS.
To download and install Falcon Gateway:
Visit the Falcon Gateway download page using any web browser such as Safari.
Click Download to download the installer.
After the download finishes, a file named FalconGateway.dmg will appear in your Downloads folder.
Double-click the FalconGateway.dmg file.
A Finder window will open showing the Falcon Gateway application.
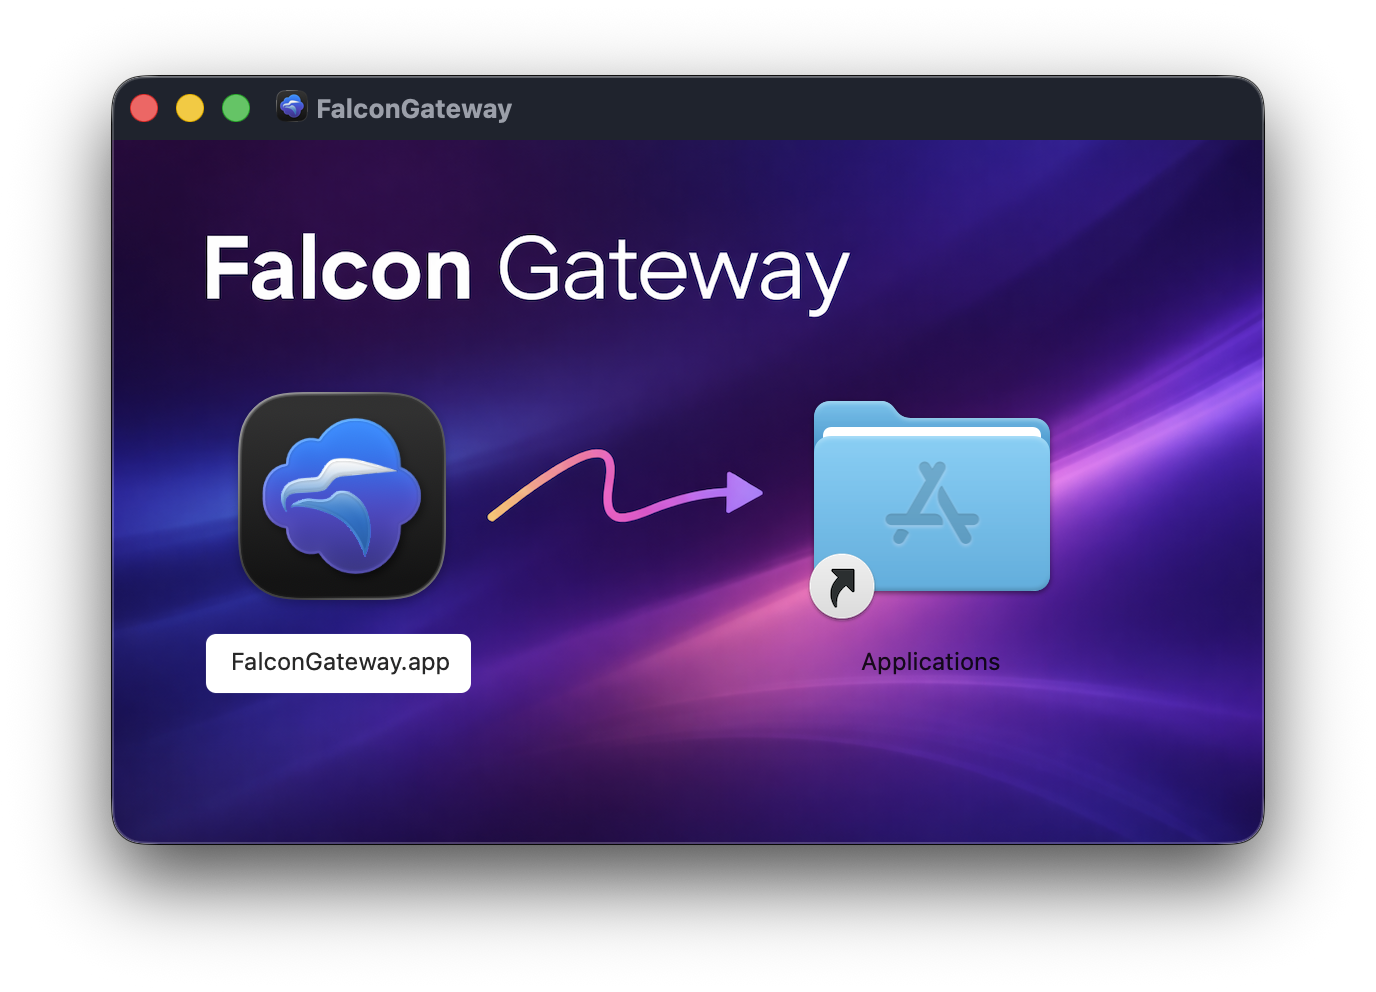
Drag FalconGateway.app into the Applications folder.
This installs Falcon Gateway on your Mac.
After copying the application, eject the disk image by right-clicking FalconGateway in Finder and selecting Eject.
Open Applications and launch Falcon Gateway.
Important
Always copy FalconGateway.app to the Applications folder before opening it.
Running the application directly from the DMG can cause configuration and permission issues.
The first time you launch Falcon Gateway, macOS may display a security confirmation dialog.
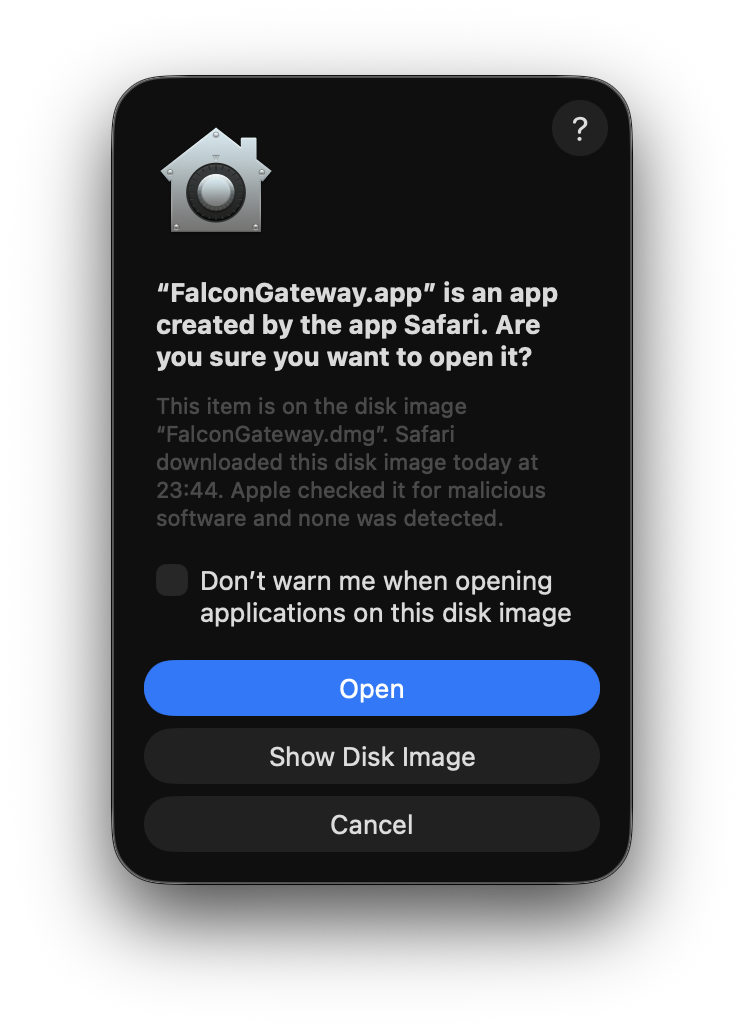
Click Open to continue.
macOS displays this prompt because the application was downloaded from the internet. Falcon Gateway has already been checked by Apple for malicious software.
Falcon Gateway needs permission to communicate with devices on your local network. This allows the gateway to receive DICOM studies and advertise itself using Bonjour.
When prompted, click Allow.
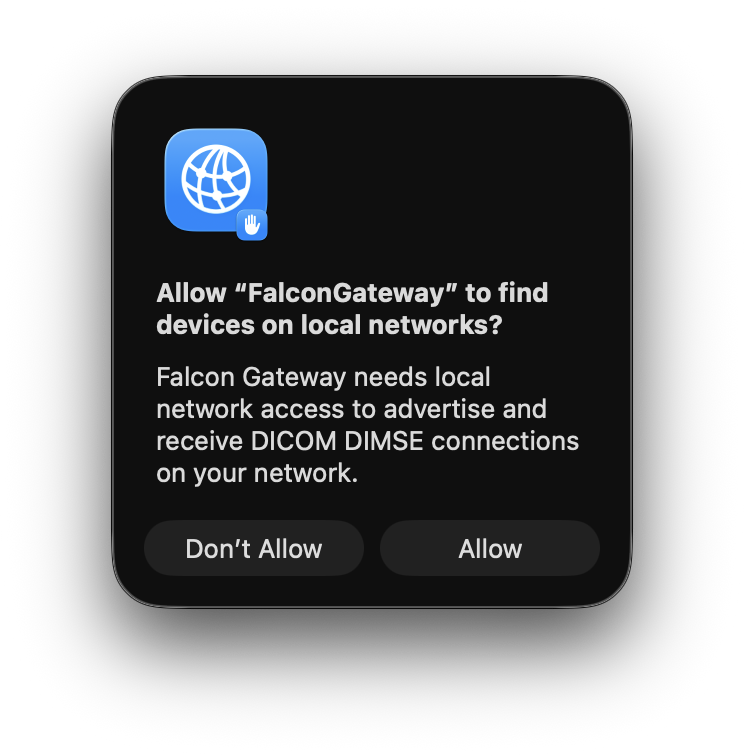
If you select Don't Allow, Falcon Gateway will not be able to receive DICOM connections from scanners or PACS systems.
You can change this permission later in:
System Settings → Privacy & Security → Local Network
When Falcon Gateway launches for the first time, a setup wizard will guide you through the initial configuration.
The setup typically takes 2-3 minutes.
The wizard introduces the configuration process and explains what will be set up.
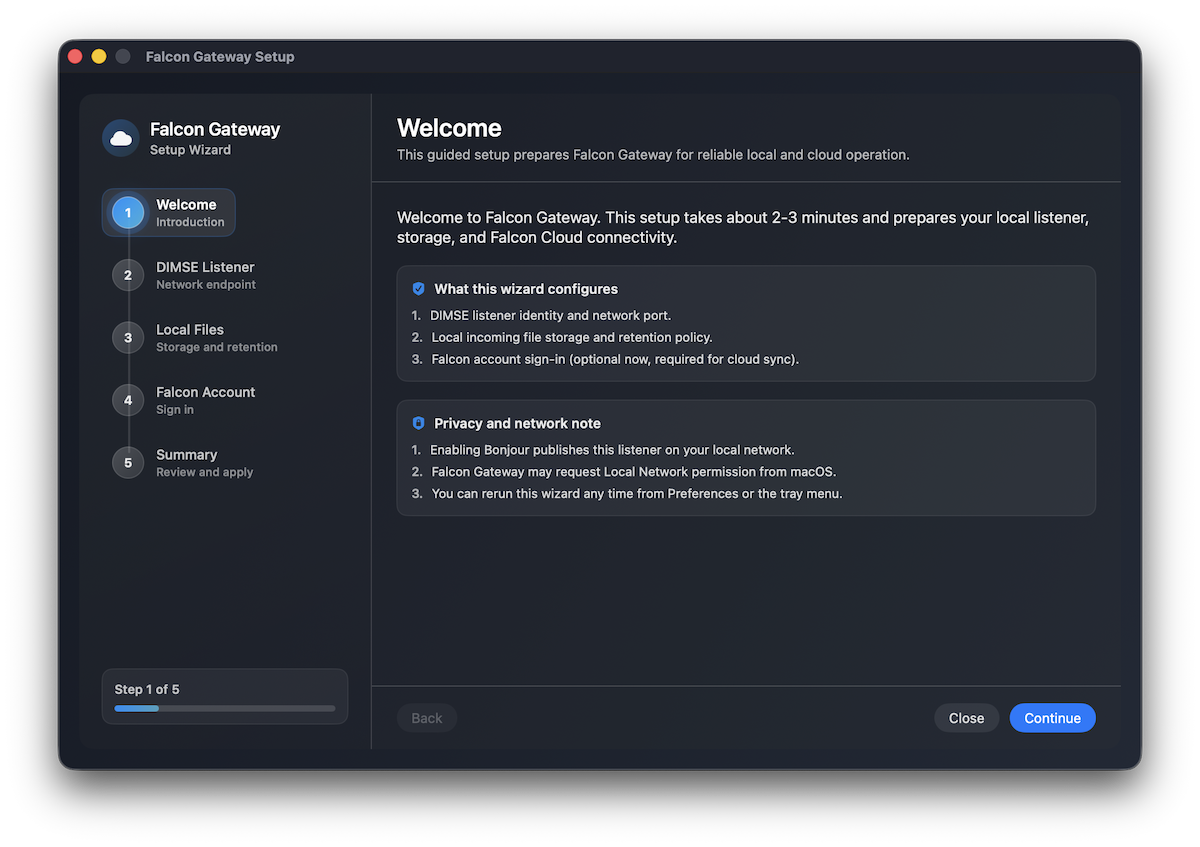
The wizard will configure:
Click Continue.
This step defines how scanners or PACS systems connect to Falcon Gateway.
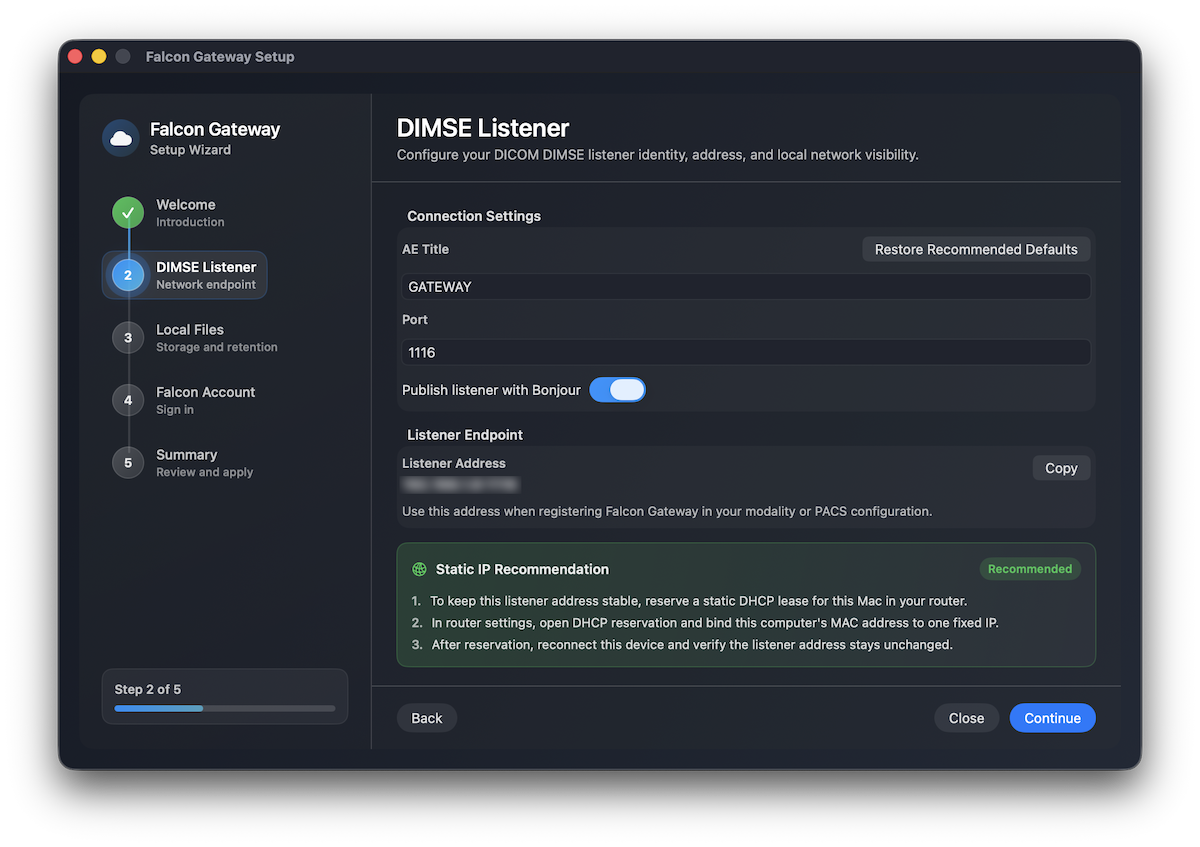
Settings include:
AE Title
Default: GATEWAY
Port
Default: 1116
Publish listener with Bonjour
Allows devices on your network to automatically discover the gateway.
The Listener Address displayed in this screen is the address you will configure in your modality or PACS system.
Recommendation
Assign a static IP address to the Mac running Falcon Gateway to prevent connection problems.
Click Continue.
Choose where incoming studies should be stored locally.
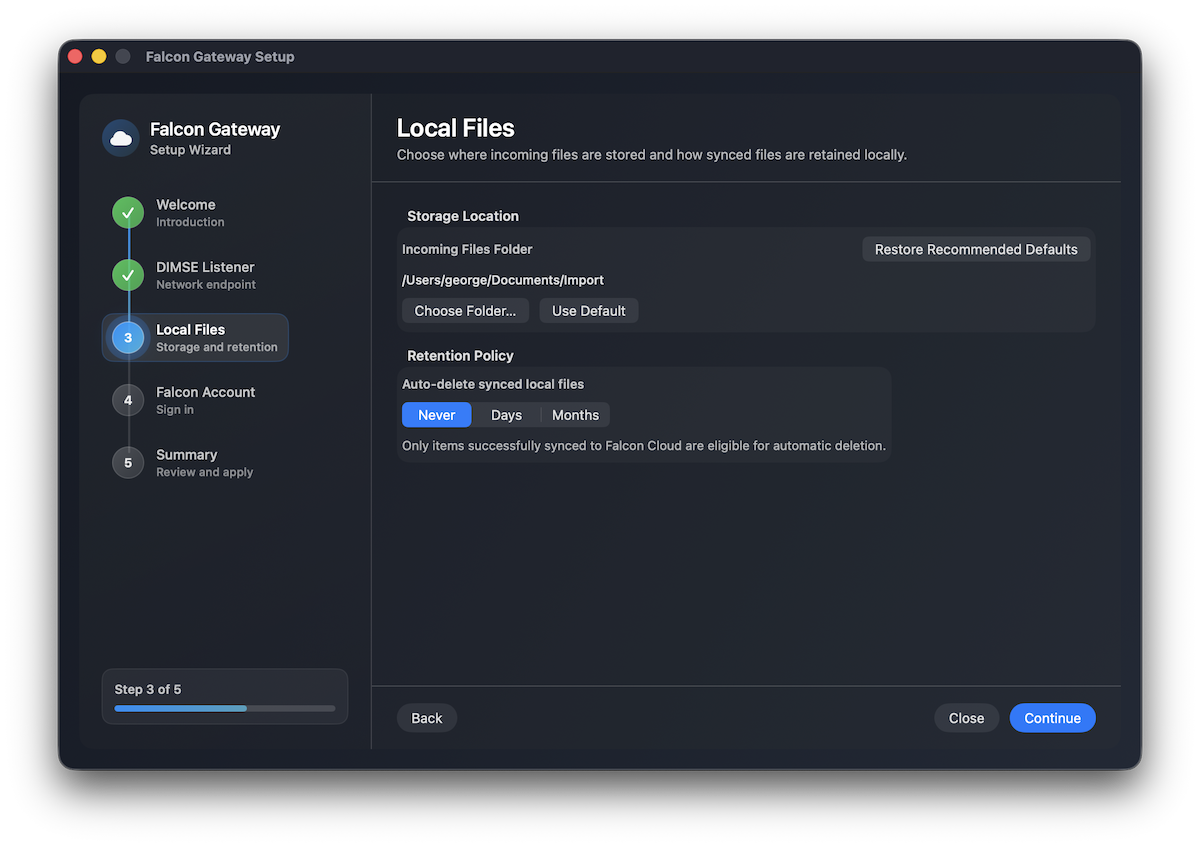
Options include:
Incoming Files Folder
Default location: ~/Documents/Import
You can choose a different folder if needed.
Retention policy
Controls when files synced to Falcon Cloud are automatically deleted locally.
Click Continue.
You may optionally sign in to your Falcon account.
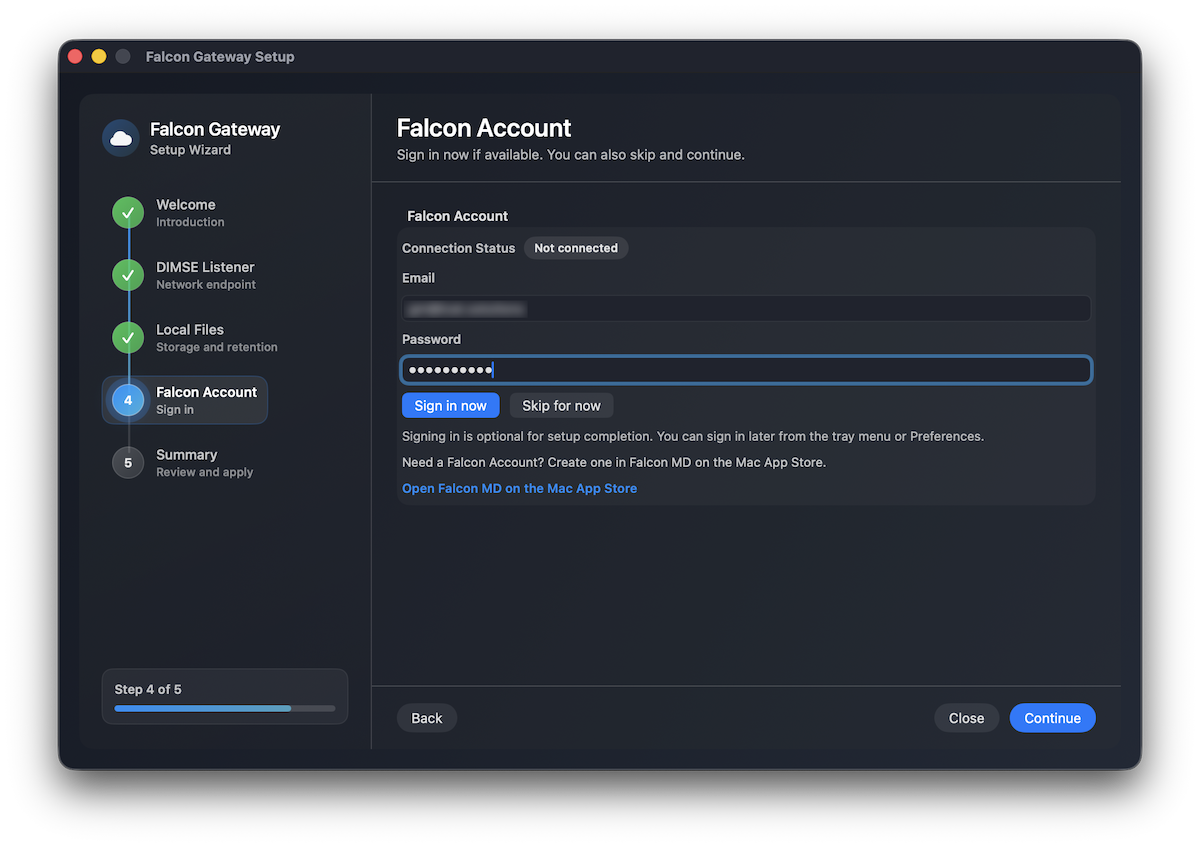
Signing in enables:
You can also select Skip for now and sign in later.
Once signed in successfully, the account status will show as Connected.
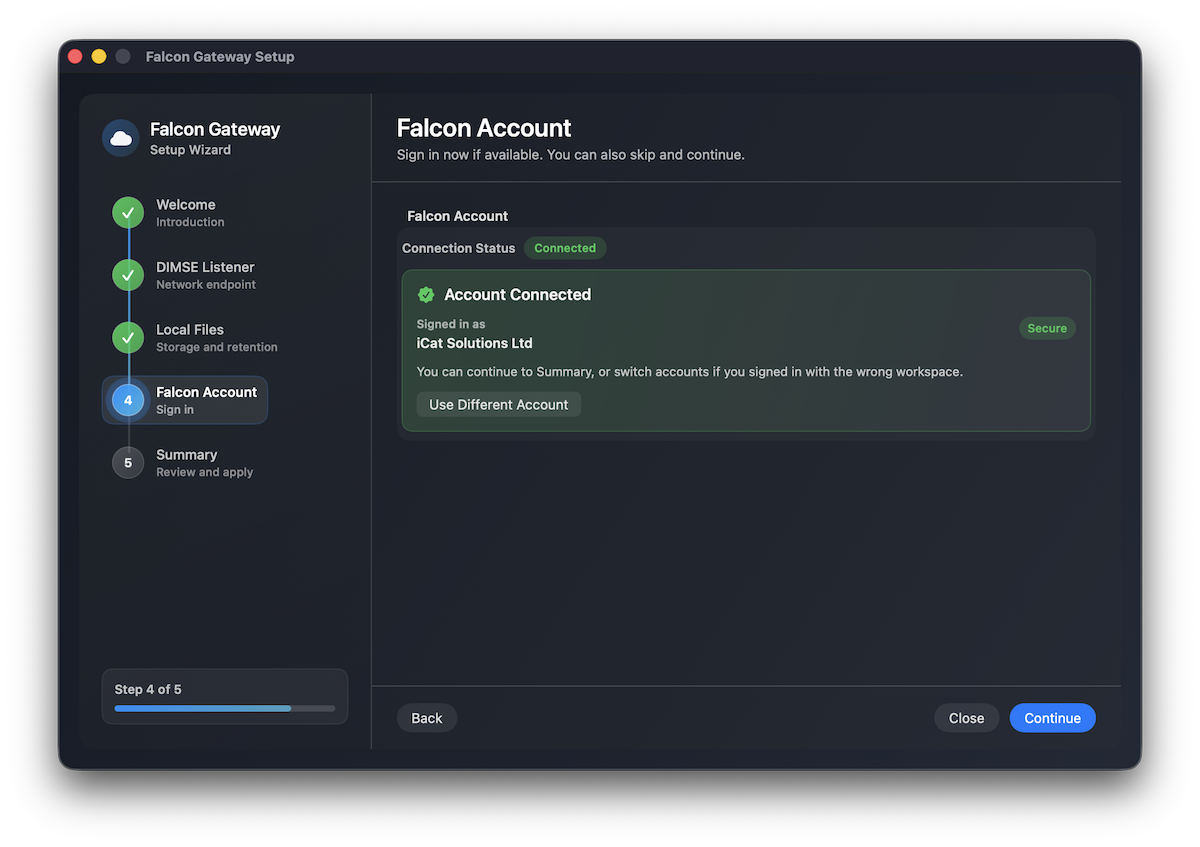
Click Continue.
The final step shows a summary of your configuration.
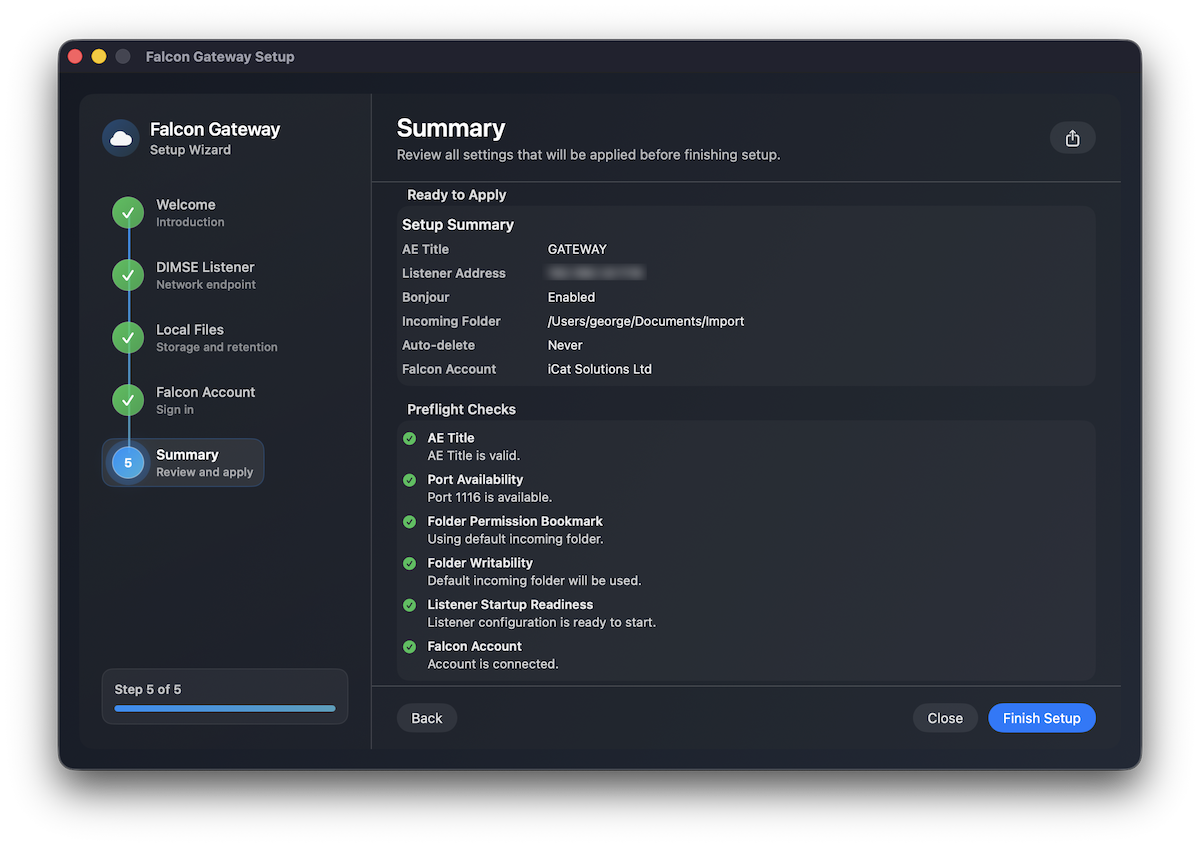
The summary includes:
If all checks pass, click Finish Setup.
Falcon Gateway will now start its DICOM listener and be ready to receive studies.
Check the following:
If you accidentally selected Don't Allow, you can enable it again:
This usually means the configured port is already in use.
Return to the DIMSE Listener settings and select a different port.
Check that: